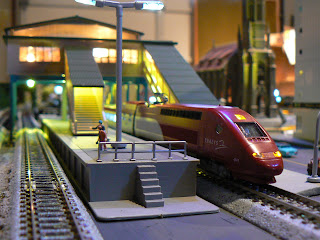
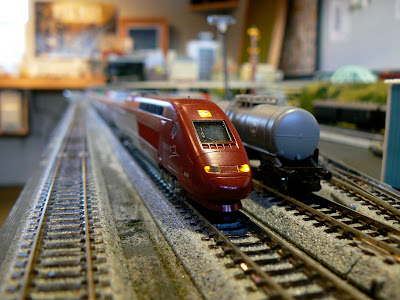
Another non-Minitrix locomotive/train, this time the very beautiful TGV Thalys. I have been fortunate to have taken the Thalys from Paris to Amsterdam, and it was as wonderful a ride as it is a beautiful train (yep, that's yours truly in the photo with the "1:1" scale version!).

My real world experience with the Thalys was another one of those experiences that led me to 'return' to N Scale. I had seen the Thalys offered by Kato, and I knew, even if I didn't end up doing any modelling in this scale, I had to have it (of course, by now, I'm very clearly committed to N scale!).

This was actually the fourth N Scale item I got. After the Minitrix Digital Starter set with the Class 03 and V221, the TEE followed, and then the Thalys. Therefore, it was actually the very first DCC installation I had to do myself as the previous engines all came pre-installed.

The set is advertised as "DCC Ready", but what precisely that means, is almost anyone's guess. What it turns out to mean is that you need to get at least one or more of the following: An ESU manufactured replacement light board (KATO147456) and a NEM651 compatible decoder. While the ESU kit comes with 2 light board replacement boards, you are left to wonder how you get the lights to change over correctly in the non-powered unit? You could just leave the original light board installed, unfortunately, KATO's original light board has white LED's while the ESU board has yellow LEDs.

I didn't really want to have white light boards in the non-powered unit, and the only solution was to use two decoders for the Thalys. For my first DCC decoder installation, this was turning out to be a very challenging task. Thanks to the internet, there were a lot of websites with some clues as to how I should do this, but no specific instructions on how to program 2 decoders that will be installed in the same train set, but only one is powered, and the only function of the other decoder is to switch the lights depending on direction. While that may sound simple to someone who's been using DCC for years, for a newbie, this situation was fraught with questions.
Fortunately, I did not end up frying any decoders. Through a process of carefully reading the manual (which, for the Minitrix Mobile Station was neither thourough or long!) and plenty of 'tutorials' on the web, I basically figured out that giving both decoders the same address (although programmed seperately) but giving one the proper CV codes to reverse the lights, proved to not be the disaster that I thought it would be. I got it running!! Once I got it running, the sleek 10 car set looked great, but all of those 'dark windows' did not look right, and I ended up installing the appropriate Kato light kits to add lighting to the set. Not sure if that was such a good idea, as the contacts on passenger car light sets/kits are not the most reliable (can someone please figure out some new technology for this? Is there a solution?). Some of the cars look like they are having a strobe light party...oh well. Here's some impressions....
Impressions:
PROS:
- Looks great. Kato's obvious experience with these types of train sets is apparent in how well (especially mechanically) the set moves and looks around pretty tight radii. The close coupling is amazing.
- Powerful. The engine in this thing is amazing. Very powerful and very quiet. Another plus for Kato.
- Reliable. This little engine swings around its 10 car set and never misses a bit on track that may cause other engines to falter. Excellent.
CONS:
- "DCC Ready"? Come on, what does that mean? Kato needs to get with the 21st Century and start installing decoders or at least allowing for NEM651 plugs.
- Decoder fitting: As if the challenge I talked about above was not enough, once I finally got the decoders programmed, it turns out in this case that you need decoders with the long wire harness, not just the NEM 651 decoders that only have the short plug and no wires. Why oh why can manufacturers not be clear about whether there is space for the decoder and a long harness is needed to fit the decoder in the shell? Well, the good news is I ended up with spare decoders for another install! But, it keeps going....
- Weak shell to chassis connection: The method in which most N scale locomotive shells fit onto the chassis seems to be either too loose or too tight (both are bad!). In this case, the connection/tabs/friction tags between the shell and the chassis are very week, and I had significant difficulty (particularly with the non-powered unit) to get the shell to sit right on its chassis....and stay there!
- The couplers between the Powered Units and the transition (M2?) cars. For reasons beyond me, there are two types of non-standard close coupling mechanisms in this set: A very efficient and effective and easy to manage 'coupler' between the passenger cars, and then a very silly 'scissor-like', flimsy, and fragile friction type connector between the engines and the transition cars that you have to try and 'snap' together without snapping the couples or your precious train apart. I ended up actually snapping one and had to order a replacement (the ONLY source I found was MG Sharp in the UK, which thankfully had them. They are listed as "Eurostar Couplers" but are just the same. I ordered extras! And if I go through all of those, I will glue the connectors together so that the engine and the transition cars are permanently attached!).
Passenger Car lights: The kits were relatively simple to install, but getting all of the tiny brass parts so that they have good contact (particularly around curves) proved very difficult. The result is train where the lights are flashing on and off, particularly around the curves. Well, we're travelling between Paris and Amsterdam, let's just pretend those little N scale people are having a party in there....

I guess with so many 'cons' listed against this set, one might wonder if I felt it was worth it and would I buy it again knowing the problems and frustrations that I had? Yes, although the many hurdles that one has to go through sometimes to get something to work right, does have the tendency to take ones affections away, its a beautiful set unmatched or not produced by any competitor (that I know of) and franly, the price is pretty good for as much of a set that you get. When you add in decoders, light kits, etc... it does add up, but I feel it was worth it.
UPDATE: See new/updated information on the decoder installation at this post!

No comments:
Post a Comment